Product photography10 Juni 2021Updated 16 Oktober 202618 min read
Packshot photography: a quick guide for 2026
What a packshot is, where it's used, and how to shoot one - camera settings, lighting, angles, tricky packaging, and the image specs marketplaces ask for.
Table of contents
Packshot photography is a style of product photography that shows a product - often with its packaging and label - on its own, usually against a plain white background, so buyers see exactly what they'll get. There are no props, no models, and no scene. A good packshot is sharp, color-accurate, evenly lit, and consistent with every other image in your catalog.
This guide covers what a packshot is, where it's used, the camera and lighting setup, how to handle tricky packaging, the image specs UK marketplaces ask for, and how to produce packshots at scale.
Key takeaways
A packshot shows the real product, isolated and accurate. A lifestyle shot shows it in use. Most product pages need both - the packshot goes first.
White (RGB 255, 255, 255) is the default primary-image background in the GS1 image standard and on Amazon's main product image - but it's the approach, not the color, that makes a packshot.
Start with a low ISO (100), an aperture around f/8-f/11, a tripod, and a fixed white balance around 5500 K.
Soft, diffused light shows shape and color honestly. Side light brings out texture. Black cards control reflections on glossy packaging.
Keep retouching light. A packshot that changes a product's color or texture misleads the buyer and sets up a return.
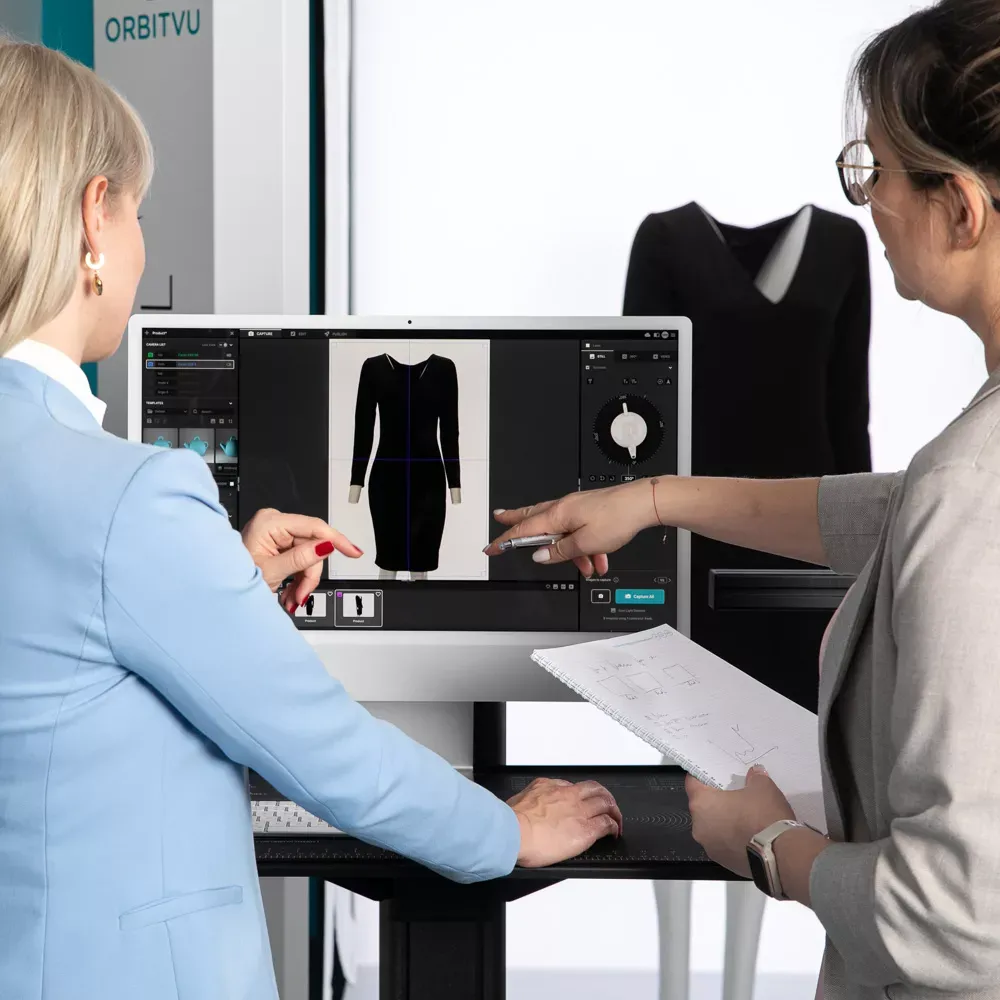
Consistency across hundreds of SKUs comes from templates - taped marks and notebooks in a manual studio, saved sessions in software like Orbitvu Station.
What is packshot photography?
A packshot is a clean, informative image of a product, shot so the buyer can judge its shape, color, texture, and label without distraction. The term comes from advertising, where the packshot is the shot of the product and its pack, often at the end of a TV commercial. In e-commerce, it now means the main product image on a white or neutral background. You'll also see it written as "pack shot".
Simplicity is the point. A packshot gives as much product information as possible, and nothing else.
Packshot vs lifestyle vs still life photography
Packshot
Lifestyle
Still life
What it shows
The product alone, often with packaging
The product in use or in a real setting
The product in an artistic composition
Background
White, transparent, or plain color
A real scene, often with people
Styled set with props
Main job
Inform - show exactly what the buyer gets
Inspire - show how it fits their life
Attract - build mood and brand image
Where it's used
Main product image, marketplaces, catalogs
Secondary images, social, ads
Campaigns, editorial, print
Consistency across SKUs
Essential
Less important
Not expected
Wolf & Badger, the London-based marketplace, is a good example of how the two work together: its apparel image guidelines require at least one front-facing cut-out packshot on a pure white background, and strongly recommend model and lifestyle shots on top.
Where is packshot photography used?
Online stores and marketplaces. The main image on most marketplaces and retailer sites is a packshot. Many platforms set rules for background, product-to-frame ratio, and minimum size (see the specs table below).
Industrial and technical catalogs. Spare parts, components, and tools need packshots too - often more strictly than consumer goods, because the image has to show the exact part, finish, and markings a buyer or technician is checking against.
Sales and marketing materials. Sales teams need products shown precisely and fully, without a distracting background, so images drop straight into decks and one-pagers.
Printed catalogs and brochures. Sharp packshots on white let the product sit next to text or go into a montage.
Billboards and ads. A high-resolution packshot gives large-format marketing its informative anchor, and it's the closing frame of many TV ads.
Does packshot photography mean a white background only?
No. What makes a packshot is how you photograph the product, not the background color. The three common options:
Background
When to use it
White (RGB 255/255/255)
Primary images on marketplaces and retailer sites; the GS1 standard's default
Transparent (PNG or clipped TIFF)
Images that will be placed on different backgrounds - banners, catalogs, montages
Plain color (including black)
Brand pages, campaigns, and social posts where color ties products to a brand look
That said, if the image is the main image on a marketplace, white is usually the rule, not a choice.
What equipment do you need for packshot photography?
Whether you're building a corner setup or a full in-house product photography studio, the kit list is similar:
Equipment
Why it matters
Camera with manual controls
You need to lock aperture, ISO, and white balance so every product in a range looks the same
Macro lens, ideally 1:1
Small products and label text need close focus and fine detail
Standard lens (around 50 mm)
Natural perspective for medium and large products
Tripod or fixed camera arm
Repeatable framing across hundreds of shots
Continuous lights or flash, with softboxes and diffusers
Soft, even light that shows shape and color honestly
White and black cards
White cards fill shadows; black cards define edges on glossy surfaces
Shooting table or light tent
A white, curved surface with no visible horizon line, for small and medium products
Turntable
Consistent rotation for multi-angle shots and 360° spins
See your future studio in action
Show us what you sell, and we'll show you exactly how to capture it - packshots, video, and product data, captured live from your sample.
A full-frame sensor measures about 36 × 24 mm; an APS-C sensor is smaller, around 23.5 × 15.6 mm (the exact size varies by brand). At the same framing and aperture, APS-C gives you more depth of field, so more of the product is sharp front to back. That helps with packshots, where you want the whole product in focus. Full-frame gives you more detail and cleaner images in low light, but you may need focus stacking for small products.
How do you prepare a product for a packshot?
Most retouching time is spent fixing things that could have been fixed before the shutter clicked. Before each shoot:
Clean it. Dust, fingerprints, and smudges show up at packshot resolution. Wear cotton gloves for glossy or metal products.
Shape it. Straighten labels, fill out soft packaging, and fix dents or creases in boxes.
Remove what doesn't belong. Price stickers, protective film (unless the buyer receives it that way), and loose tags.
Check the SKU. Confirm you're shooting the right variant and color before you start the set.
For a full checklist, read how to prepare products for a photography session.
What camera settings work best for packshots?
Start here and adjust per product type:
ISO: 100, or as low as your camera allows, to keep noise out of texture and label detail.
Aperture: around f/8-f/11 for front-to-back sharpness. Go smaller than f/11 and diffraction starts softening the image, so switch to focus stacking instead.
White balance: fixed, matched to your lights - around 5500 K for daylight-balanced lamps. Never auto, or color shifts between shots.
Focus: manual, or autofocus locked on the label or the product's front face.
Shutter speed: on a tripod with constant light, whatever gives correct exposure. With flash, stay within your camera's sync speed.
File format: shoot RAW (or RAW + JPEG) so you can correct color without losing quality.
Write your settings down, or save them in a template, so the next shoot matches the last one. Tethering software makes this easier - you control the camera from a computer, check every frame on a big screen, and reuse the same settings session after session.
How do you light a packshot?
A packshot has one job: show the product as faithfully as possible. Shape, texture, and color need to look the way they do in real life, because that's what the buyer is paying for.
Diffuse your main light. Softboxes or a light tent give broad, even light and soft shadows.
Use side light for texture. Light raking across fabric, leather, or wood shows the surface. Flat front light hides it.
Match color temperature. Keep all lamps at the same color temperature (around 5500 K, close to natural daylight) and set your white balance to match.
Continuous or flash - both work. There's no quality difference. Continuous light lets you see the result in live view and frees you from sync-speed limits; flash freezes movement and gives more power.
Document your setup. If you move studios or shoot in batches, draw a setup plan with distances, angles, and light strength, so you can rebuild it exactly.
For a full walkthrough, read our product photography lighting guide. For white or pale products, see shooting white products on a white background.
How do you shoot glossy or transparent packaging?
The "pack" in packshot is often the hardest part. Glossy boxes, bottles, jars, and blister packs reflect your lights, and glass or clear plastic can disappear into a white background.
Glossy boxes and tubes. Move lights to the side so reflections fall away from the camera, and use black cards around the product to keep edges defined. Long, narrow softboxes give clean strip reflections instead of hot spots.
Bottles and jars. A light behind the product, through a diffuser, shows the shape and the liquid level. Black cards on either side draw a dark outline so the edges don't vanish.
Clear plastic and glass. Shoot against a lit white background for a bright look, or a dark one for strong edge lines - then check the label is still easy to read.
Labels. Keep them flat to the camera and in focus. If glare hides the text, adjust the light angle before you reach for post-production.
Reflections you can't avoid at capture can be handled later - AI Retoucher removes reflections and blemishes while keeping the product real. And if you need the label data itself, not just the picture, AI OCR extracts it from the packaging during the shoot.
Which angles should a packshot set include?
Pick one angle set per product category and use it for every SKU. The GS1 Product Image Specification numbers its standard views (1 = front, 2 = left, 3 = top, 7 = back, 8 = right, 9 = bottom) and prefers a center front view taken at 15° elevation. A practical shot list:
Shot
What it shows
Front (primary image)
The product as the buyer recognizes it on the shelf
Front at 15° elevation
A little depth, so it reads as a 3D object
Back
Ingredients, nutrition, or technical label
Left and right sides
Profile and depth
Top
Lids, closures, or controls
Detail close-ups
Texture, stitching, finish, label print
360° spin (optional)
Every side, controlled by the buyer
Some categories need their own approach. See our guides for large products, clothing, and flat lay fashion. Jewelry gets its own section below.
What are the image requirements for UK marketplaces and Google Shopping?
Channel or standard
Key packshot requirements
Amazon UK
Main image on pure white (RGB 255/255/255); product fills about 85% of the frame; 1,000 px or more on the longest side to enable zoom; no text, logos, borders, or watermarks
500 × 500 px minimum (the new requirement applies from 31 January 2027), 1,500 × 1,500 px or above recommended; product fills 75-90% of the image; no borders, watermarks, or promotional overlays; max 16 MB
Background removed to white (RGB 255/255/255); clipping path recommended; web primary images 900 × 900 to 2,400 × 2,400 px - read more on how automation helps meet GS1 image standards
A useful rule of thumb: shoot at 2,400 × 2,400 px or more and export smaller versions per channel. You can always scale down. You can't scale up.
How do you edit packshots in post-production?
Post-production usually has four stages (our post-production guide covers each in detail):
Cut the product from the background (see our step-by-step guide to product background removal).
Apply a uniform background - usually white.
Retouch the surface: dust, scratches, fingerprints.
Correct color: saturation, vibrance, and contrast.
Don't overdo it. A packshot that makes a product look a different color or texture misleads the buyer, and that's how returns start. Edit to clean up the image, not to change what the product looks like.
Yes. Background removal, cropping, alignment, and contrast or sharpness adjustments can all be automated, and done in seconds instead of minutes per image. Automation also standardizes output across a team, because every image runs through the same template.
The difference is where it starts. Most AI background removal works on the finished photo, so it guesses where the product ends. Orbitvu's IQ Mask (how AI Masking works) uses a separate capture to separate the product from the background, so the product keeps its real shape and natural shadow. You can see the difference in our video, Product photography | Automated vs Manual - background removal.
Product photography | Automated vs Manual - background removal
How do you take packshots of jewelry?
Jewelry is the hardest packshot category: small, reflective, and full of detail buyers zoom in on. For more on this, read our 10 jewelry photography tips.
Position it. Use T-bars for earrings and foam or clear supports for other pieces - you'll remove them in post. Rings can be shot flat or standing upright.
Clean it. Polish every piece before the shoot and wear cotton gloves. A good packshot captures fine detail, and that includes marks and fingerprints.
Set the camera. Stay at f/8-f/11 and ISO 100. At macro distances, depth of field is shallow - especially on full-frame - so use focus stacking: several shots at different focus points, merged into one sharp image.
Soften the light. Keep it subtle and diffused, usually a mix of front and side light. Rings are the trickiest, because curved metal reflects everything around it.
Edit with restraint. Remove supports and dust, then check sharpness, contrast, and color against the real piece.
M U Jewellers shows what this looks like in practice. Using Alphashot Micro with Superfocus (Orbitvu's focus stacking), the team gets hallmark numbers and stone quality visible in every shot - which, in their words, helps "validate the jewelry." Read the M U Jewellers case study.
Should you use a shooting table or an automated studio?
Shooting table
Automated photography studio
What it is
A curved white plexiglass or plastic surface, backlit to create a white background
Camera, lights, turntable, and software working as one system
Setup per product
Lights and camera arranged by hand; needs flash and lighting know-how
Loaded from a saved template
Consistency across a catalog
Depends on the photographer and their notes
Repeatable lighting, camera position, and angles
Background removal
Manual, in editing software
Automatic (IQ Mask)
360° spins
Slow to shoot and assemble
Captured and assembled in one pass
Publishing
Export and upload by hand
Batch export to your store
Best for
Low volume and one-off hero shots
Growing catalogs with a fixed image standard
A shooting table is a good starting point, and light diffusers make it better. But every product still needs manual arranging and editing. An automated studio costs more up front, and it pays back in production time: templates, guided workflows, and direct publishing to your e-commerce platform. If you're weighing the options, our buyer's guide to product photography systems lists what to check before you buy.
How do you produce packshots at scale?
The steps above work in any studio. At scale, the difference is how much of the repetition you do by hand - and whether capture, processing, and publishing run as one end-to-end workflow or as separate jobs.
Alphastudio Compact handles medium-sized products up to 80 × 70 × 130 cm and 100 kg - sporting goods, musical instruments, suitcases, small home appliances, tools - with capture, processing, and publishing in one workflow:
Eight individually controlled light panels and a motorized 125 cm turntable, all controlled from the software.
Templates save lighting and camera settings per product type, so every SKU in a range gets the same packshot.
AI Photo Assistant suggests lighting and camera settings for the product you're shooting. The final choice is yours.
IQ Mask removes the background automatically while keeping the product's real shape.
Stills, 360° spins, and video from one studio - a full spin of 36 images in under two minutes.
Batch publishing to your online store, with 150 products a day possible on one studio.
Shooting smaller products - cosmetics, packaged food, jewelry, spare parts? The Alphashot range brings the same template-based workflow to tabletop scale.
A packshot is a photo of a product on its own, often with its packaging and label, usually on a plain white background. It shows the buyer exactly what they're getting, with no props, models, or scene.
What's the difference between a packshot and a lifestyle photo?
A packshot isolates the product to inform the buyer about its shape, color, and details. A lifestyle photo shows the product in use or in a real setting to inspire the buyer. Most product pages use a packshot as the main image and lifestyle shots as secondary images.
What background should a packshot have?
White (RGB 255, 255, 255) for main images on marketplaces and retailer sites - it's the default in the GS1 image standard. Transparent backgrounds work for images placed on banners or in catalogs, and plain colors work for brand and social content.
What camera settings are best for packshot photography?
A good starting point is ISO 100, an aperture of f/8-f/11, a tripod, manual or locked focus, and a fixed white balance matched to your lights (around 5500 K). Shoot RAW and save your settings per product type.
How do you photograph glossy packaging?
Move your lights to the side so reflections fall away from the camera, use black cards to define the edges, and choose long, narrow softboxes for clean strip reflections. Fix glare at capture first and keep retouching for what's left.
What size should packshot images be?
Shoot large and export per channel. The GS1 standard recommends 900 × 900 to 2,400 × 2,400 px for web primary images, Google Merchant Center recommends 1,500 × 1,500 px or more, Amazon needs 1,000 px or more on the longest side for zoom, and eBay requires at least 500 px on the longest side.
Can packshot photography be automated?
Yes. Automated studios control the camera, lights, and turntable from software, apply saved templates, remove backgrounds, and publish images to your store in batches. Orbitvu's Alphastudio Compact, for example, can shoot 150 medium-sized products a day.
Talk to Orbitvu about your workflow
Use the form to tell us what you are planning and what kind of product content workflow you need.
AI-generated product images are fast and cheap, but they can drift from the real product. Here is where generated images lose product truth, what makes AI in product photography trustworthy, and how Orbitvu uses AI around the real product, never instead of it.
What tethering software actually does, how wired and wireless compare in 2026, the five categories of tools on the market, and how to choose one for a high-volume product photography studio.